Chicken Paillard with Summer Salad

Standard

What to do with those delicious cucumbers (or pickling cucumbers, as the case may be) and cherry tomatoes? Like a message from heaven, this recipe found its way into my inbox last week and within 24 hours this dish was on the table. Hopefully this post will be similarly times for you.

20140730-200348-72228403.jpg

This recipe is adapted from its original version on Weelicious, which is full of family-friendly recipes, often especially geared toward kids.

Crispy Chicken Paillard with Summer Salad (serves 2 normal appetites and 1 lighter)

Prep Time: 15 mins,
Cook Time: 10 mins,

Ingredients

2 boneless and skinless chicken breasts
1/2 cup flour
1 large egg, whisked
1 cup panko bread crumbs
1/2 teaspoon salt
1 Tb canola or vegetable oil, for the pan
1/2 cup halved cherry tomatoes
1 pickling cucumber, thinly sliced
1 tablespoon chopped cilantro
1 teaspoon lemon juice

1.Place one chicken breast between 2 sheets of parchment paper and pound using a tenderizer until about 1/3 inch and even thickness. Repeat with all the breasts.
2. Season each chicken breast with 1/4 teaspoon salt.
3. In 3 small dishes place flour, egg and breadcrumbs separately.
4. Dredge both sides of chicken breast in flour, followed by egg and then bread crumbs and repeat with remaining breasts.
5. Heat about 2 tablespoons of oil in a skillet over medium high heat and place chicken breasts in skillet (do in batches if needed and add extra oil if needed for second batch)
6. Fry until golden brown, about 5-6 minutes and flip to brown other side
7. Place tomatoes, cucumbers, corn and cilantro into a mixing bowl. Drizzle with lemon juice and toss to coat
8. When chicken is golden brown and fully cooked place on a cooling rack to cool slightly
9. Spoon salad over top and serve immediately.

Source: http://weelicious.com/2014/07/25/chicken-paillard-with-summer-salad-recipe/

So here’s how I would adapt this next time:
* Definitely use seasoned panko or include grated Parmesan cheese in with the panko OR both! The breeding needs a bit more flavor.
* Maybe dice the cucumber instead of slicing. The chunkier pieces were definitely easier to eat.
* If I have corn on hand, I would try to add that into the salad just to try it the way Weelicious does it.

Regardless, I loved the salad itself. I will definitely do that again– a little lemon and cilantro? Done!

Crustless Zucchini (Cousa Squash) Tomato Quiche

Standard

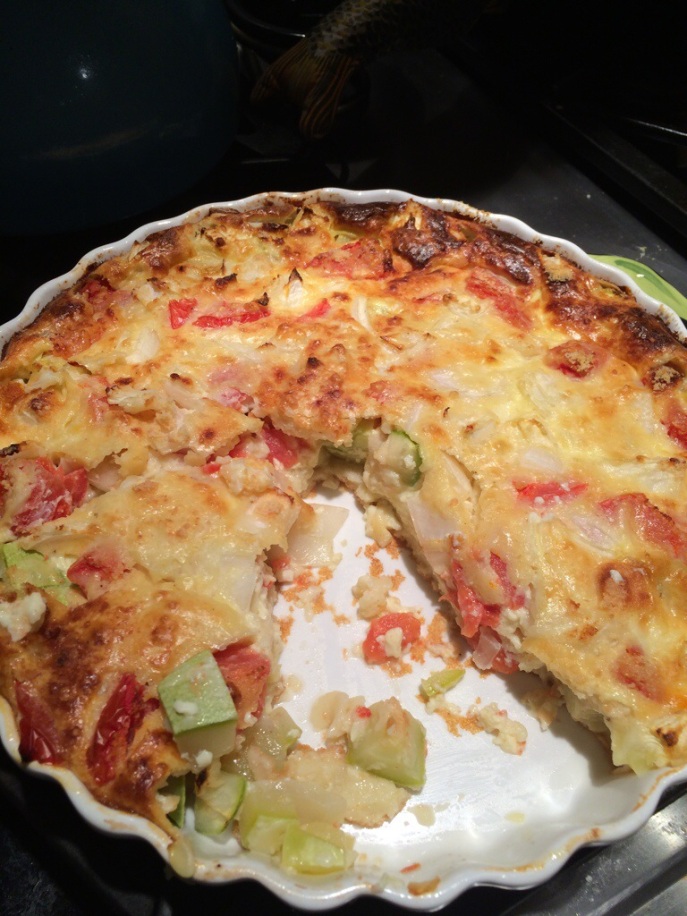
What to do when the summer varieties of squash start rolling in via your CSA share? Try new things.

20140713-014234-6154411.jpg

This recipe is slightly adapted from the Simply in Season cookbook.

2 cups Cousa squash (original recipe calls for zucchini), chopped
1 cup tomatoes, chopped
1/2 cup Vidalia onion, chopped
1/3 cup Parmesan cheese, grated

1.) Start with the above ingredients and add to a grease 10 inch pan. I used an actual quiche dish from Crate & Barrel.

1 1/2 cups milk
3/4 cup baking mix (I used Bisquick)
1/2 tsp salt
1/4 tsp freshly ground black pepper
3 eggs

2.) Beat the above ingredients in a blender (we did by hand) until smooth.
3.) Pour mixture over the vegetables.
4.) Bake in 400 degree oven until knife inserted in the center comes out clean, about 30 minutes (it was closer to 40 minutes for me).
5.) Let stand for a few minutes to cool before serving. If desired, garnish with fresh parsley (we didn’t).

This, plus some blueberry pancakes served with Vermont-made vanilla creme fresh, made for a delicious “breakfast supper.” Our 4-days-shy-of-1 year old was able to enjoy all parts of this meal without any adjustments.

Thanks to Allandale Farm CSA for the squash and to my family’s farm in PA, Harvest Valley Farm, for the tomatoes!

Want to see a brief video? Check out the vine (video).

Quick & Easy Dinner

Standard

20140713-020622-7582603.jpg

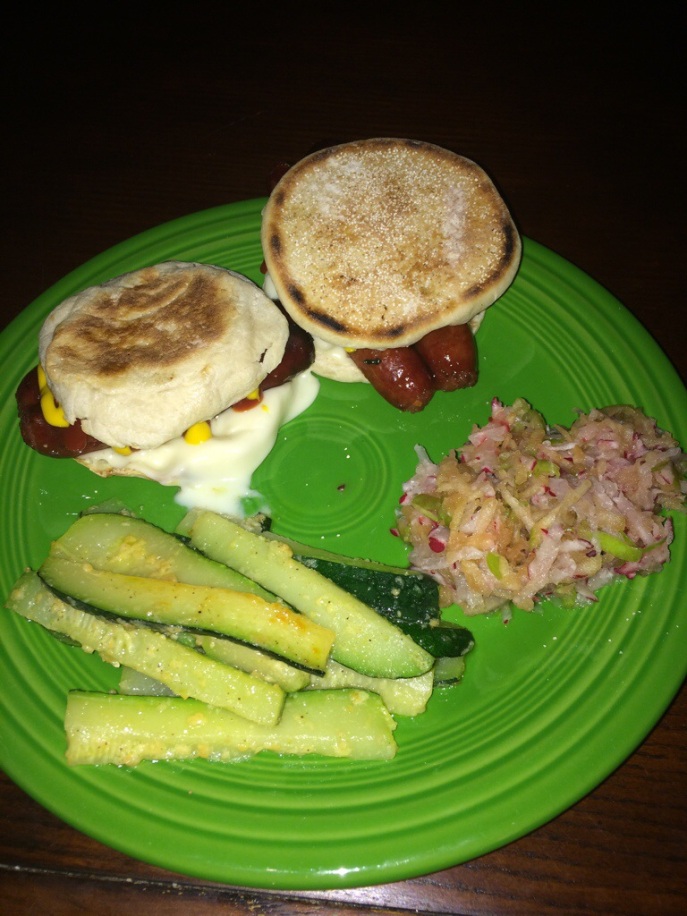
After coming home from our travels to a friend’s wedding over the 4th of July, I was in a frenzied state trying to use as much of our CSA produce as possible so our fridge wouldn’t explode. I made a ton of food for Desi, our almost one year old– mostly steamed veggies. But I wanted to try something different to try to use up some of the radishes, which we seem to get more of each week. I opted for an easy “slaw” of my own creation.

Apple-Radish Slaw

1 Granny Smith apple
3 larger radishes
1/2 lemon

1.) Shred the radishes and apple. (Easier said than done with the apple. The peel was a pain to try to shred, but I wanted to keep it to enhance the visual appeal of the dish).
2.) Combine shredded apple and radish in a bowl.
3.) Squeeze lemon juice on apple and radish (for flavor and to try to keep the apple from browning. After about an hour in the fridge, it was clear that the browning was still definitely happening).

I’ve seen recipes for something like this with vinegar and other condiments, but I honestly think this was great as is. Tons of flavor, super fresh tasting, lots of crunch. Yum! Desi enjoyed it too!

The other side item to this meal was a zucchini chopped into spear shapes, sautéed.

1 zucchini, halved, then cut long-ways, then sliced into spears
1/2 Tb Extra Virgin Olive Oil
1/4 tsp garlic powder
1/4 tsp seasoned salt
1/2 Tb Parmesan cheese, grated

1.) Heat the oil in a pan and them add zucchini. Be sure to toss to coat with the oil.
2.) Dust the zucchini with garlic powder and seasoned salt throughout cooking.
3.) Continue to cook and place cover on top of pan to keep the zucchini moist and speed up the cooking by sort of steaming it.
4.) Sprinkle Parmesan a couple of minutes before done to the tenderness you prefer. This will allow it to melt a bit.

The meat portion of this dish has nothing healthy in it. It’s an English muffin with a grilled beef brat split long-ways and splayed between the bread. I topped mine with a piece of cheese, Heinz (ketchup), and mustard.

Combined it made for a pretty yummy impromptu meal.

Taco Salad

Standard

20140702-060848-22128933.jpg

Handful of tortilla chips (we used blue corn scoops)
3/4 lb ground beef
1 packet mild taco seasoning
1 small head lettuce, torn into small pieces
Tomato, chopped
1/4 avocado, chopped
1 cup shredded cheddar cheese
Sour cream
Salsa

1.) Brown beef, add seasoning packet and water and cook per package instructions. Remove from heat and keep warm.
2.) Lay down a layer of tortilla chips in the bottom of a bowl.
3.) Layer the lettuce, tomato, avocado, cheese, and beef.
4.) Allow the eaters to add their own sour cream and salsa per their preference. Instruct them to mix it all up and crush the chips at the bottom. Eat and enjoy!

Total Time: 20 minutes

I always love taco salad and was excited to do this as another salad variation to use up some of the abundance of lettuce we have been getting from our CSA over the pasted few weeks. I highly recommend this and encourage anyone to play with the components to make the salad more to your taste.

Beef Stir Fry

Standard

IMG_3400

3/4 lb steak, cut into pieces
1 Tb grapeseed oil
4 cups napa cabbage, chopped
1/2 roasted red pepper, chopped
1/4 cup garlic scapes, chopped
1 large red radish, sliced (thick)
1 1/2 Tb Stir fry sauce

1.) In a wok, cook the steak until medium doneness. Remove from wok and keep warm.
2.) Add grapeseed oil to wok and let heat briefly. Then add garlic scales and cook about 1 minute.
3.) Add radish, napa cabbage, and radish and toss to cover in oil and garlic. Then cover and cook, tossing frequently with a wooden spoon.
4.) When the vegetables are mostly cooked down and wilted, add stir fry sauce to the top edges of wok and toss then vegetables to coat.
5.) Add steak and toss to combine.

Total time: About 30 minutes

We were bigs fans of this meal, especially since we used some quality meat. I think I would redo this with a bit more stir fry sauce and rice next time around and that would really make this a total meal.

Grilled BL(T) Pizza

Standard

20140702-051422-18862500.jpg

Ingredients:
Store bought pizza crust (we used a long rectangular crust from Costco)
1 Tb Olive oil
1 cup shredded mozzarella cheese
1/4 cup shredded sharp cheddar cheese
1/4 lb bacon, chopped into half inch pieces
1/2 large head of Bibb lettuce, chopped into small pieces
1 Tb mayonnaise

1.) Spread the olive oil over the entire top of the pizza crust with a kitchen brush.
2.) Top the center of the crust with both cheeses.
3.) Cook the bacon pieces via stovetop until almost perfectly done and crisp. Blot the bacon with a paper towel, then spread the bacon over the cheese.
4.) Toss the pizza onto the grill (we have a gas grill and used aluminum foil to cover the grill face. I recommend spraying the foil if you go this route to prevent sticking/burning.). Cook until the cheese is totally melted and the crust looks crispy and golden.
5.) Let pizza rest while tossing the chopped lettuce with mayonnaise to completely cover. (This would be the place to add the tomatoes too but we didn’t have any.)
6.) Cover the center of the pizza with the dressed lettuce, then cut to serve.

Total time: About 30 minutes

We were hungry hippos, so the one pizza was perfect for both of us to have 3 pieces each.

Super delicious. I highly recommend!