Roasted Red Peppers with Sausage & Ricotta Meatballs

Standard

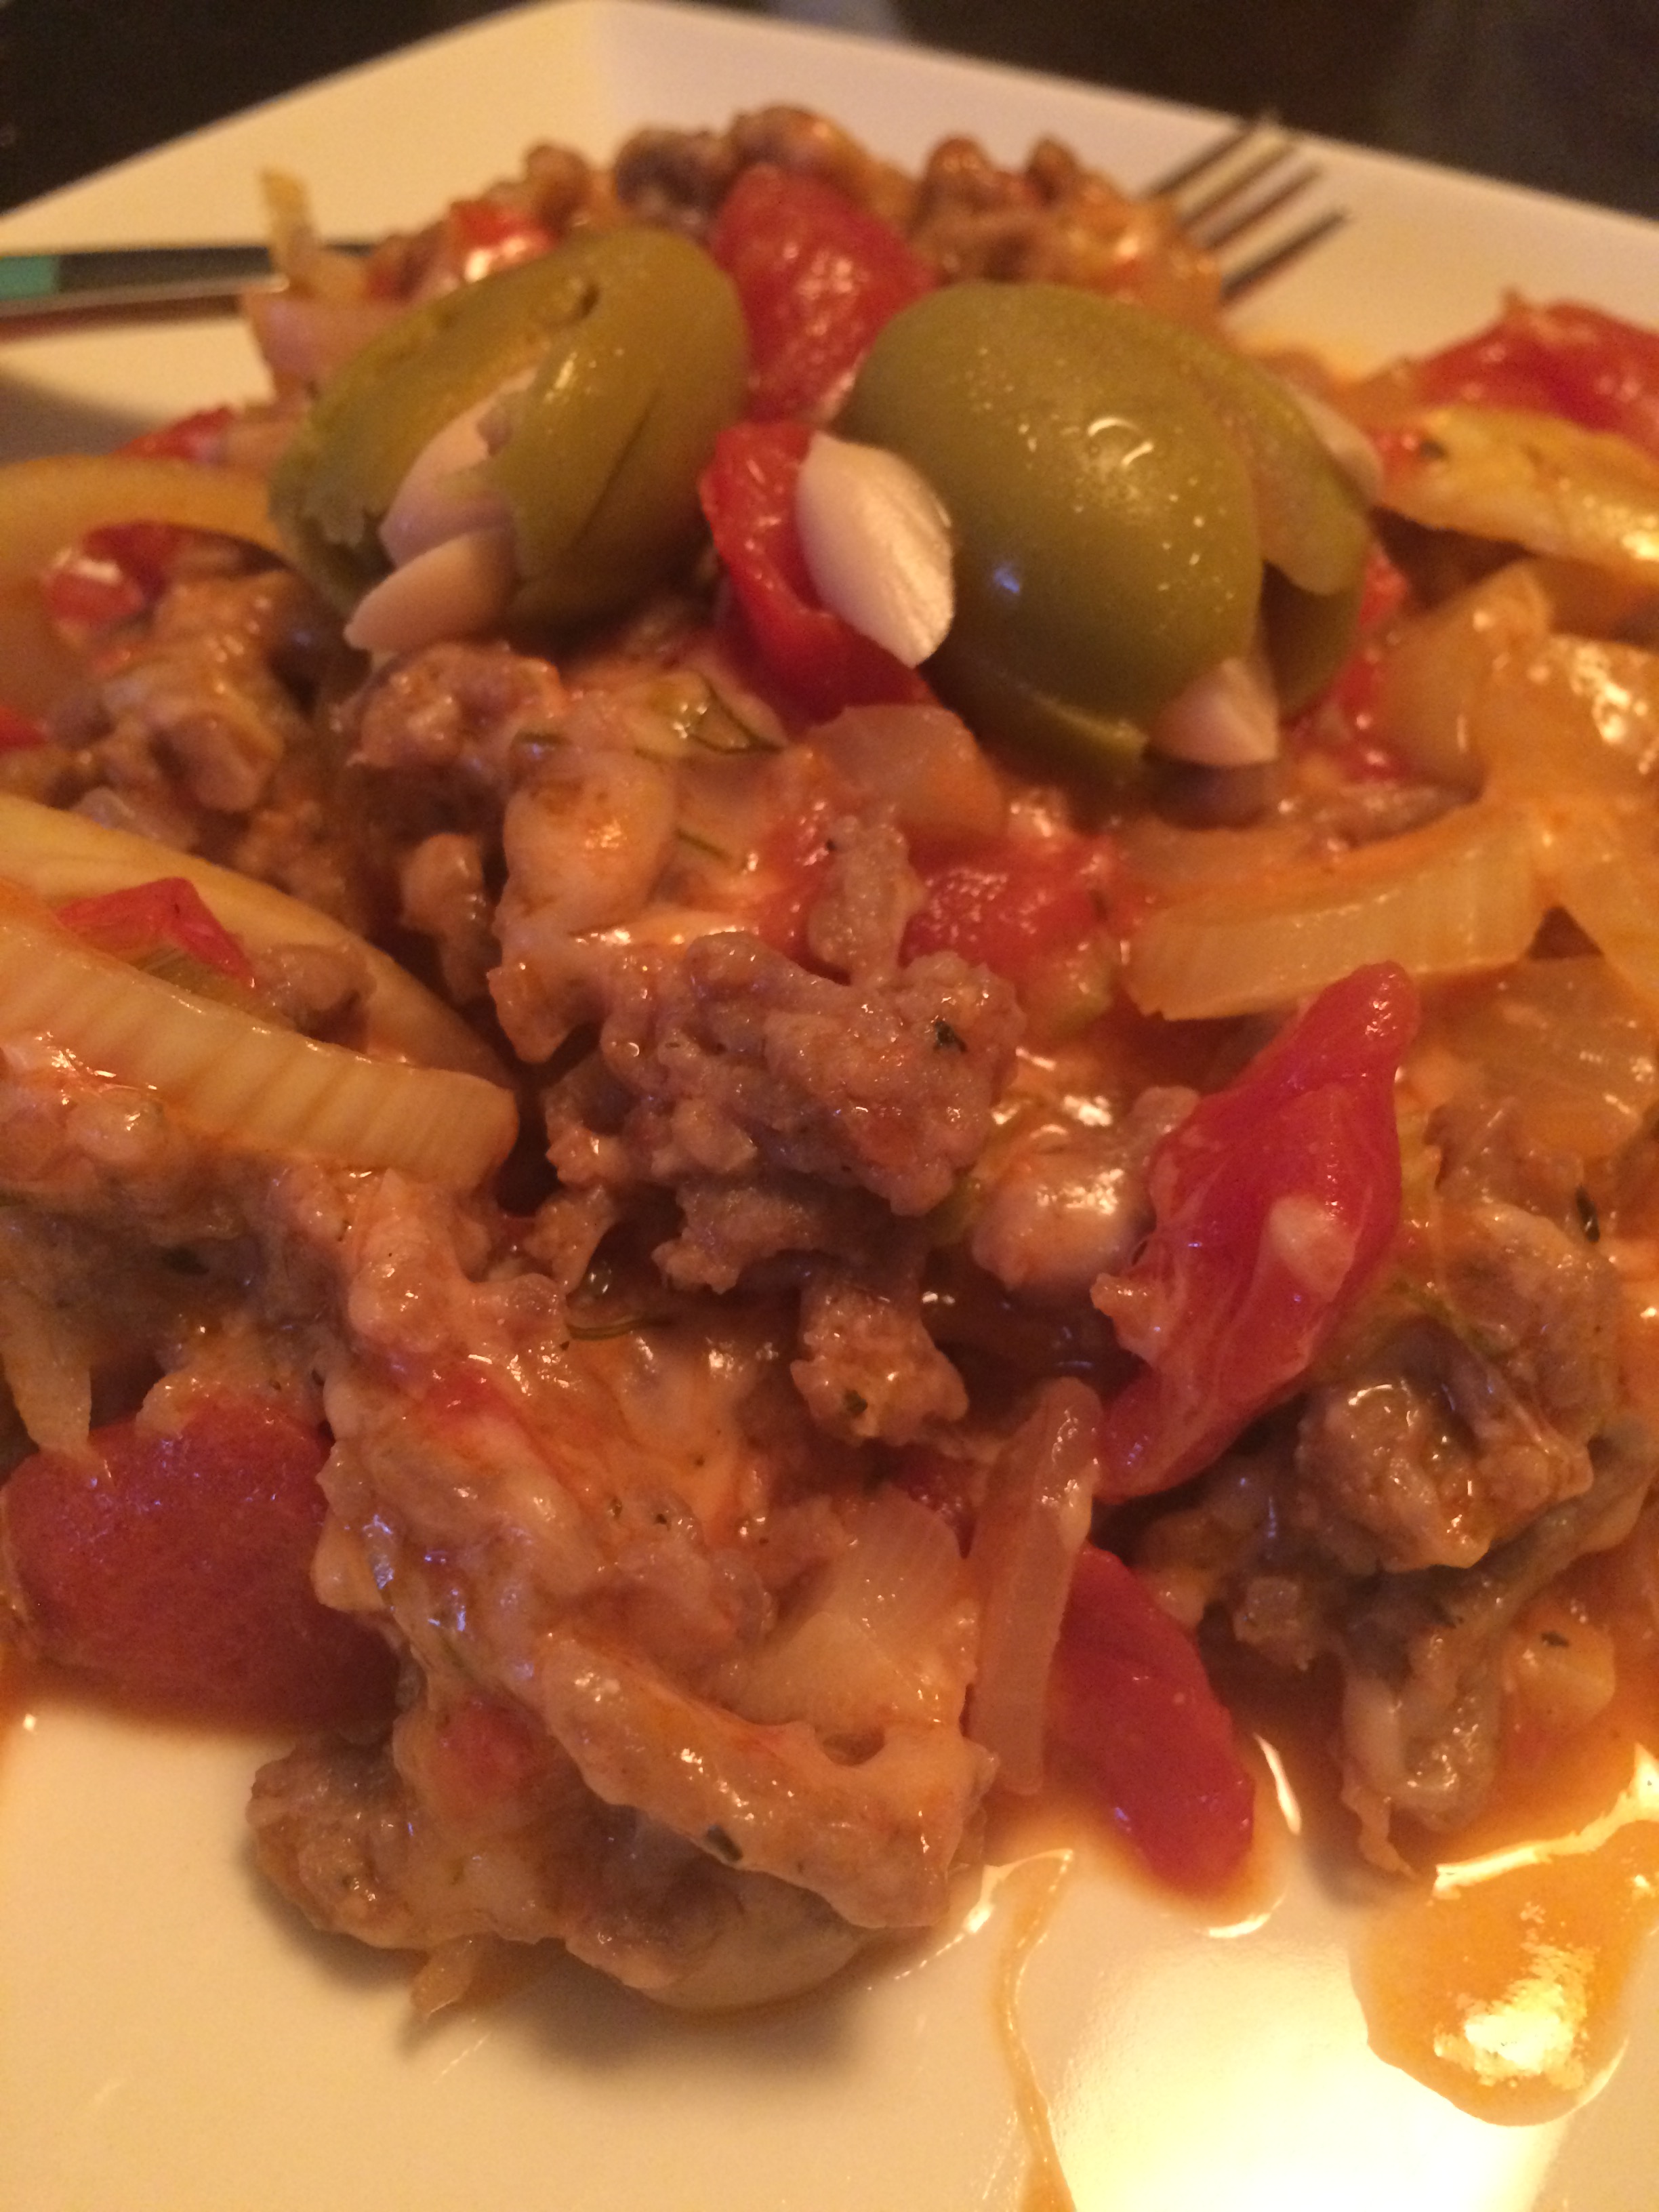
We had this one tonight. It was pretty dang delicious and had such an interesting depth of flavor. I saw the recipe for Pork and Ricotta Meatballs in Cook’s Country and saw lots of potential in it, including ways to use those pesky sweet red peppers we had hiding in the veggie drawer. So here is my wildly adapted version of this recipe, broken into a few parts.

Sausage and Ricotta Meatballs
Serves 4-5

2 slices bread, torn into small pieces
4 oz (1/2 cup) ricotta
5 sweet italian sausage links (total about 20 oz), removed from casings
1/4 cup Parmesan Reggiano Cheese, grated
1 1/2 Tb dried parsley
1 egg
1 shallot, minced
2 garlic cloves, minced
1/2 Tb salt
3/4 tsp pepper
1/2 tsp grated lemon zest (1/2 lemon)

1. Adjust oven rack to lower-middle position and heat oven to 450 degrees. Set wire rack on a baking sheet lined with aluminum foil or baking pad. Spray liberally with Pam.
2. Combine bread and ricotta in a large bowl and mix with a fork, let stand, and mix again, until a smooth paste forms, up to 10 minutes.
3. Add sausage, Parmesan, parsley, egg, shallot, garlic salt, pepper, and lemon zest to bread mixture and mix with hands until thoroughly combined.
4. Divide mixture into 16 equal portions. Roll meat between wet hands to form meatballs and sapce evenly on prepared wire rack.
5. Roast meatballs until browned and cooked through to about 155-165 degrees. Check after about 35 minutes. If not hot enough, put back in for another 10-15 minutes.

Roasted Red Peppers
Serves 4-5

4 sweet red peppers
1 Tb olive oil
pinch salt, pepper
juice of 1/2 lemon

1. Cut out the stems and remove the seeds from peppers. Slice length-wise.
2. Brush olive oil on peppers on all sides. And sprinkle with lemon juice.
3. Sprinkle with salt and pepper.
4. Roast along with the meatballs and take out right as you notice the edges turning dark. These should be soft when poked with a fork.

Sauce
Serves 4-5

1/8 c olive oil
5 garlic gloves, smashed and peeled
2 medium tomatoes, cored and chopped
juice of 1/2 lemon
salt and pepper

1. While meatballs and peppers are in the oven, combine oil and garlic in a dutch oven set over low heat and cook until garlic is soft and golden on all sides, about 8-10 minutes, stirring occasionally.
2. Stir in tomatoes. Cover with lid slightly ajar. and bring to simmer over medium high heat.
3. Squeeze lemon juice into sauce. Season with salt and pepper. Reduce heat to medium low and simmer until sauce has thickened somewhat. Turn off heat and let sit.
3. When you take the meatballs and peppers out of the oven, pour this into a food processor and process until smooth.

To plate, with an extra 1/4 cup grated Parmesan:
1. Lay down two roasted red pepper halves.
2. Sprinkle some Parmesan over peppers.
3. Place 4 meatballs on top of the peppers.
4. Ladle sauce over the meatballs.
5. Garnish with more Parmesan.

Then enjoy! I loved the garlic and lemon in this dish. The sausage was incredible. The meatballs were killer and could’ve been just fine on their own, but the sweetness of the red peppers and the sauce brought everything together.

Nutrition:
Weight Watchers Points: 12

22073655161_3b716477d7_o

22073656311_1707816835_o

Super Stuffed Tortillas

Standard

Again, I’m drowning in bell peppers (and zucchini, still, and now corn too!), so I went after this delicious sounding dish from my Simply in Season cookbook. The original version was meatless, but I felt like having some tasty meat tonight, so cue the ground beef. I have to say, it turns out better than I even expected. And Desi, our 2 year old, ate a ton of it. Huge win-win in my book.

(Adapted from Simply in Season)
Serves 6-8

4 tsp oil, divided
1 large clove garlic, minced
1 small onion, chopped
1 green pepper, chopped
2 c corn, cut fresh from uncooked cob
1 medium zucchini, quartered, then sliced
1 Tb ground cumin
1 c canneloni beans (original recipe calls for black beans, but we had these on hand already)
1 c chicken broth
1 lb ground beef
2 tsp Southwest Seasoning (or taco seasoning)
6 Tb salsa
6-8 flour tortillas
1/2 c cheddar cheese, shredded

1. In a deep skillet, saute garlic in 2 tsp oil for about a minute. Add onion and pepper and saute until tender-crisp.

2. Add corn, zucchini, and cumin and continue to saute until all vegetables are tender.

3. Meanwhile, brown ground beef in a separate skillet. When just a little pink is still showing, sprinkle on southwest or taco seasoning. Continue cooking.

4. Add beef to skillet with veggies. Add beans, chicken broth, and salsa. Cook until there is no excess moisture. Turn off heat.

5. Wash out the skillet you used for the beef and heat a small amount of oil, then add a single tortilla. In the middle of the tortilla sprinkle cheese. Let it melt a little, then scoop about 1/2 cup of the vegetable/meat mixture and continue cooking. When the sides of the tortilla start rising a bit and the tortilla is crispy, fold it up and plate. Continue cooking individual tortillas this way.

6. Serve with sour cream.

Nutrition:
Weight Watchers Points: 9 (10 with sour cream)

Filling mixture of veggies & meat

Filling mixture of veggies & meat

Tortilla cooking in skillet

Tortilla cooking in skillet

Stuffed Bell Peppers

Standard

Stillman’s CSA strikes again… an abundance of green peppers all in the last few weeks. I love stuffed peppers and this recipe that I found on Pinterest sounded like a winner. It ended up being pretty delicious and resulted in a nice variety of leftovers. More on that after the recipe.

(Adapted from Kalynskitchen.com)
Serves 4 + Small leftovers

2 large green bell peppers
1 c uncooked brown rice
1 c onion, diced
3 tsp olive oil
1 link bratwurst
1/2 tsp dried oregano
1/2 c grated Parmesan
1/4 c shredded mozzarella

1. Cook rice according to directions on package, or make in a rice cooker.

2. Preheat oven to 375. Prepare a square baking dish by spraying with cooking spray.

3. Slice the tops off of the peppers and remove the stems. Dice the remaining flesh from the pepper top.

4. Slice peppers longways so you have 4 halves total. Lay the peppers down, cut side up, and notice if one side seems to be higher than the other. Where you see this, slice off about a half inch thick section and dice that as you did with the pepper top. You should end up with about a half cup of diced pepper. (If not, don’t stress… you want your peppers to be like little bowls, so don’t trim too much!)

5. Place peppers in the baking dish, fitting them so they move as little as possible.

6. Heat 2 tsp of the oil in a large skillet. Add the diced onion and pepper and cook about 3 minutes until somewhat softened. Remove to a bowl.

7. In skillet, add remaining 1 tsp of oil. Squeeze bratwurst out of its casing and cook until browned, breaking it up into small pieces throughout the cooking.

8. Add onion/pepper mixture back into skillet. Add oregano. Salt and pepper to taste.

9. Add the cooked rice and Parmesan cheese and cook long enough to warm, about 2 minutes.

10. Spoon the mixture into the hollowed out peppers. Fill them as much as you can until the filling starts falling out. Sprinkle with mozzarella cheese, then bake for about 20 minutes, until peppers can be punctured with fork fairly easily, but still have a little resistance.

11. If you had any leftover filling, place in small ramekins and top with mozzarella as well. Bake alongside the stuffed peppers for variety in your leftovers.

Nutrition:
Weight Watchers Points: 6

3 of the 4 stuffed peppers nestled in the baking dish

3 of the 4 stuffed peppers nestled in the baking dish

Bonus filling in ramekins!

Bonus filling in ramekins!

Kielbasa with Bok Choy Gratin

Standard

As you can tell from my previous post, I had some bok choy on hand and I had great plans for it. I found this amazing sounding recipe for bok choy gratin on a weird website call chocolate broccoli. I put all the ingredients into my Weight Watchers app so I could figure the points value, and planned to go back to the recipe when the time came to make the dish. Unfortunately in between my finding the recipe and my going back to actually prepare the recipe, chocolate broccoli had allowed its domain to expire. So… yeah. The result is that although the ingredients were inspired by that page, this one is otherwise entirely original. So, enjoy.

Serves: 4

1 clove garlic
1 Tb butter, divided in half
1 1/2 c onion, chopped
2 small heads bok choy, chopped (leaves & stems)
1 1/2 oz prosciutto, diced
1/4 c chicken stock
3/4 c milk
1 Tb flour
salt & ground black pepper to taste
4 oz Gruyere, shredded
1 Tb panko breadcrumbs

1. Preheat oven to 425.

2. Slice garlic in half and rub along the inside of a casserole dish. Then mince the garlic.

3. Melt 1/2 Tb butter in a large skillet. Add minced garlic. Cook about 1 minute, then add chopped onion.

4. In a separate pot, steam bok choy until you can easily insert a fork into the stalk pieces.

5. Add chicken stock to the garlic/onion skillet and stir.

6. Add bok choy and prosciutto to the skillet. Stir and cook until most of liquid is absorbed.

7. Pour vegetable mixture into prepared casserole dish.

8. In same skillet, melt the other 1/2 Tb butter. Add milk and heat for a minute, then add flour and whisk until smooth.

9. Slowly add about 2/3 of the shredded gruyere and whisk continuously to smooth out sauce.

10. Pour sauce over veggies in casserole dish.

11. Sprinkle panko over top.

12. Bake, covered, about 15-18 minutes.

13. Remove cover and sprinkle with the remaining 1/3 gruyere. Continue baking, uncovered, about 5 minutes more, until golden brown on top.

Skillet of garlic, onions, prosciutto, and bok choy.

Skillet of garlic, onions, prosciutto, and bok choy.

Vegetables and sauce mixed in casserole

Vegetables and sauce mixed in casserole

Bok Choy Gratin, golden and delicious

Bok Choy Gratin, golden and delicious

For the kielbasa:
As many links as you have people eating

1. Place frozen kielbasa links on a cast iron griddle and bake in the oven along with the bok choy gratin dish for the duration of the 20-23 minutes.

I *loved* this combination. It felt just right for the time of year of summer turning into fall. The kielbasa was killer because it got so well cooked that it was a little crunchy on the outside, but stayed super moist inside because it had been frozen to start out. And this bok choy gratin had incredible flavor. I highly recommend this! And encourage you to swap out the bok choy, and try this with whatever you have on hand– broccoli, spinach, whatever!

Nutrition:
Bok Choy Gratin Weight Watchers Points: 7
Kielbasa Weight Watchers points: 5 (for 2 oz)

Cooked kielbasa

Cooked kielbasa

Balsamic Roast Beef with Fresh Green Bean Casserole

Standard

I’m still dreaming about this dinner. I think it’s the most delicious meal we’ve had in a while, and I think it’s almost entirely due to how delicious that roast beef ended up being. I can’t take credit for actually making the meal, but I am responsible for setting up the menu and being a lifeline for my husband as he cooked throughout the day. If you have a beef round hanging out in your freezer like we did, and you’re looking for something to do with it… or if you are just looking for an incredible meaty meal, look no further, my friends.

Balsamic Roast Beef
(Adapted from addapinch.com)

Serves: 5
Total Time: 8 hrs 15 mins

1 3/4 pounds trimmed beef round (ours started off frozen)
4 cloves garlic, chopped
1/2 c balsamic vinegar (break out the good stuff for this recipe!)
1 c beef broth (we used beef bullion dissolved in a homemade veggie broth)
1 Tb Worcestershire sauce
1 Tb soy sauce
1 Tb honey
1/2 tsp crushed red pepper flakes

1.) Place beef into your slow cooker. In a glass measuring bowl (at least 2 cups in size), mix together all remaining ingredients. Pour over beef.

2.) Cook for 4 hours on high and 4 hours on low.

3.) When meat is ready, it should break up easily with two forks. Break meat up somewhat in slow cooker. Break it up the rest of the way in a serving dish/when serving.

4.) Serve with tongs and be sure to ladle some of the sauce overtop.

5.) Save beef and sauce leftovers for sandwiches!

Nutrition:
Weight Watchers Points: 7

20398454619_9edf05d0a9_o

From Scratch Fresh Green Bean Casserole
(Adapted from Southern Living online)

Serves: 4
Time: 55 minutes total, 25 active

3/4 lb fresh green beans, trimmed
1 Tb butter
1/8 c flour
3/4 c 2% milk
1/4 c buttermilk
1/2 Tb Ranch dressing mix
1/2 tsp dried thyme
1/8 tsp salt
1/8 tsp fresh ground pepper
1/2 tsp butter
1 c French fried onions, crushed
1/4 c panko breadcrumbs
1 plum tomato (or 2 small regular tomatoes), seeded & chopped

1. Preheat oven to 350. Cook green beans by steaming them until desired doneness (not too soft!). Plunge the beans into an ice bath to stop cooking process. Drain and pat dry.

2. Melt 1 Tb butter in dutch oven over medium heat, whisk in flour until smooth. Cook, whisking constantly, 1 minute. Gradually whisk in milk. Cook, whisking constantly, 3-4 minutes or until sauce is thickened and bubbly. Remove from heat and whisk in buttermilk, Ranch dressing mix, thyme, salt, and pepper.

3. Gently toss green beans in buttermilk sauce. Spray a square baking dish or casserole and pour in green bean mixture.

4. Combine French fried onions, panko, and tomatoes. Sprinkle over green bean mixture.

5. Bake at 350 degrees for 25-30 minutes or until golden brown and bubbly. Serve immediately.

Nutrition: 168 Cal; 8.4 g Fat (3.9 g Sat); 5.7 g Protein; 18.5 g Carb; 3.9 g Fiber; 15 mg Chol; 296 mg Sodium

Weight Watchers Points: 4

20585159875_4bc79ffc59_o

Greek & Sausage Fennel Skillet

Standard

I tried playing around with fennel a few times last year to use up what we got in our CSA, but I have to admit, I sort of hated it. That’s why I was *so excited* when I made this dish and it turned out to be one of my favorite things I’ve ever made. The original recipe is more of a side item with no protein except the cheese, but I wanted to use up some of the sausage I had in the freezer. I’ve made this dish twice using two different kinds of sausage– Jimmy Dean’s breakfast sausage first and sweet Italian sausage the second time. I would highly recommend the former, as odd as it may seem. Both times were delicious, but there was something extra rich about the breakfast sausage that just felt so savory and plain yummy. The other plug I’ll make for this dish is that it makes *excellent* leftovers for lunch at work the next couple of days.

(Adapted from Simply in Season Greek Fennel Skillet)

Serves: 5

1/2 lb sausage (breakfast or sweet Italian)
2 cloves garlic, minced
2 Tb avocado oil
2 medium fennel bulbs, sliced
1 large onion, julienned
1 Tb lemon juice
3 medium plum tomatoes, chopped
1 1/2 cups mozzarella cheese, shredded (if you want to go super Greek, you can use feta instead)
1/2 cup olives (I used garlic stuffed ones)

1.) In a medium sized pan, brown sausage.
2.) In a large frying pan saute garlic in olive oil for about a minute.
3.) Add fennel and onion and saute until tender, 5-10 minutes.
4.) Add lemon juice and tomatoes and cook over medium heat until part of liquid evaporates, about 10 minutes. Pepper to taste. Partway through, add in the sausage.
5.) Stir in cheese.
6.) Slice olives 3/4 of the way through and fan olives out as a garnish on top.

Nutrition:
Weight Watchers Points: 9

IMG_7943

IMG_7944

Pesto-Pork Pinwheels with Grilled Peaches

Standard

Looking for a way to use up that random pork loin and frozen pesto ice cubes you’ve had in your freezer?  Looking for an excuse to buy a bunch of peaches?  No?  Just me?  Well, this is a pretty tasty complete meal anyhow, and it’s a nice opportunity to use the grill outside rather than heating up your whole house with the oven/stove.


(Adapted from Eating Well, July/August 2015 Issue)


Total Time: 35 Mins

Serves: 4 (2 pinwheels, 2 peach wedges each)


Equipment:

Six 12 inch skewers


Ingredients:

3/4 cup coarse fresh breadcrumbs

1/2 cup prepared pesto (I used my mustard green pesto I saved in ice cubes)

1 Tb extra virgin olive oil

1 Tb balsamic vinegar

1/4 tsp ground pepper

1/8 tsp salt

1 lb pork tenderloin, trimmed

2 large peaches, quartered


1.) Preheat grill to medium.

2.) Combine breadcrumbs and pesto in a small bowl.  (If you use pesto ice cubes, melt them with a quick 30 seconds in your microwave.)  Combine oil, vinegar, pepper in another bowl, set aside.

3.) Lay pork on a large cutting board.  Hold the knife blade parallel to the board, make a lengthwise cut through the center of the meat, but not all the way through so it stays in one piece.  Fold open the meat so it lays flat, cut side up.  Cover it with plastic wrap and pound flat with a rolling pin until it’s about 1/4 inch thick across.  Lay it so one of the length of the original pork loin is in front of you.  Spread the breadcrumb mixture over the pork, stopping 1 inch from the opposite long side.  Starting at the side closest to you, roll up the pork.  Brush top with 1 tablespoon of the oil mixture.

4.) Toss the peaches with the leftover oil mixture.

5.) Slice the pork crosswise into 8 pinwheel slices.  Put 2 pinwheels each on 4 of the 6 skewers.  Make sure pinwheels are 1 inch apart, threading skewers through the meat to keep the pinwheel shape intact.  Be sure to put smaller pinwheels on the same skewers, so the cooking time will be equal.

6.) Slide peaches length-wise on the 2 remaining skewers to ensure skewers go through the skin.

6.) Oil the grill rack by oiling a paper towel and rubbing it over the grill rack.  Place all skewers on the grill, flat side down.  Grill turning once until the peaches are soft and the pork is 145 degrees.  The original recipe says this will be 3-5 minutes for the peaches, 8-10 minutes for the pork, however a few of my larger pork pinwheels took longer, so keep an eye on them.


Nutrition: 389 Cal; 21 g Fat (sat 5 g); 70 mg Chol; 19 g Carbs; 30 g Protein; 3 g Fiber; 435 mg Sodium

Weight Watchers Points: 10

Step 2, breadcrumb mixture

Step 2, breadcrumb mixture

Step 3, pounded pork

Step 3, pounded pork

Step 3, spread breadcrumbs

Step 3, spread breadcrumbs

Step 3, rolled pork

Step 3, rolled pork

Step 5, cut pinwheels

Step 5, cut pinwheels

Pesto-Pork Pinwheels with Grilled Peaches

Pesto-Pork Pinwheels with Grilled Peaches

Summer Vegetable Pasta with Kielbasa

Standard

This one I’m really proud of. It was incredibly delicious, made use of tons of random stuff we had on hand, and was a 100% original creation of my mind. I hope you love it as much as we did! Also, it made excellent leftovers for lunch at work the next day!

Note: You can totally get creative with this, and even leave out the kielbasa, but it really gives the sauce an incredible flavor. If you can get your hands on the Costco kielbasa links (they were recently sampling them at our Costco, and they were *so good* we had to get them), that’s what I used and it was amazing.

Summer Vegetable Pasta with Kielbasa

Summer Vegetable Pasta with Kielbasa

Prep Time: 15 mins
Cook Time: 30 mins

Serves 4

4 cups whole wheat pasta (I used linguini)
1 clove garlic
1 Tb avocado oil
1 medium zucchini
1 medium summer squash
1 1/2 cups grape tomatoes
1 link kielbasa (ours is like large hot dog size, from Costco)
2 cups bottled pasta sauce
2 Tb heavy whipping cream
1/4 cup Pecorino Romano Cheese, shredded

1.) Cook pasta according to instructions.
2.) Meanwhile, heat oil and garlic in a large skillet. Add whole grape tomatoes and cover, stirring occasionally, about 5 minutes.
3.) Add zucchini and summer squash to skillet. Cover and continue cooking, stirring occasionally. Add kielbasa to skillet after a few minutes.
4.) Pour bottled pasta sauce over veggies and meat, stirring uncovered and continuing to cook to heat the sauce through. Add heavy whipping cream and stir to combine.
5.) Dish up pasta and sauce, then sprinkle with desired amount of cheese.

Nutrition: Unfortunately, since this was all in my head and I didn’t do the math, I don’t have the full nutrition facts.

Weight Watchers Points: 14 (Totally worth it!)

Pea & Chicken Greek Salad

Standard

This is one we had tonight. As always, I had to make some modifications based on what we had on hand. It turned out pretty delicious, though, especially the last few bites that got to soak in the dressing a bit longer. We had some leftovers too, and I hope to eat them asap tomorrow to see if they’re even more delicious than our dinner tonight.

So, substitutions– The original recipe includes edamame, but I don’t typically have that on hand, so I used shell peas instead. They were great. The original recipe also calls for romaine lettuce. Our CSA gave us leaf lettuce, so that’s what I went with. I’m also not a big lover of feta cheese, and find that when we buy it, we don’t use it quickly. So instead I went with our delicious Pecorino Romano that we have on hand in the fridge. And the original recipe calls only for kalamata olives, but I had a lot of other olives on hand, so I used a mixture. And… even after I had Steve run to the grocery store to get me red onion, I forgot to slice it up and add it. Oh, and I almost forgot… I added wine to the water the chicken cooked in, which gave it an amazing aroma and a nice taste.

Pea & Chicken Greek Salad

Pea & Chicken Greek Salad

(Adapted from Eating Well, July/August 2015 Issue)

Active: 30 Mins
Serves: 4 (2 1/4 cup each)

1 8 oz boneless skinless chicken breast, trimmed
1/2 cup white wine
1/4 cup red wine vinegar
3 Tb extra virgin olive oil
1/4 tsp salt
1/4 tsp ground pepper
8 oz shell peas, shelled
8 cups lettuce
1 cup halved grape tomatoes
1/2 cucumber, sliced
1/4 cup slivered fresh basil
1/4 cup sliced olives (all kinds)
1/4 cup slivered red onion [I forgot it, but I think it would be good to keep in]

1.) Place chicken in a medium sauce pan and add water and white wine to cover by 2 inches. Bring to a boil. Reduce heat to a simmer and cook until a thermometer inserted into the chicken reads 165 degrees, about 12-15 minutes. Transfer chicken to a cutting board and let cool for 5 minutes. Chop into bite-sized pieces.

2.) Meanwhile, whisk vinegar, oil, salt, and pepper in a large bowl. Add peas, lettuce, tomatoes, cucumber, cheese, basil, olives, onion, and the chicken. Toss to coat.

Nutrition (original recipe): 336 Cal; 22 g Fat (sat 5g); 48 mg Chol; 14 g Carb; 22 g Protein; 6 g Fiber; 550 mg Sodium

Weight Watcher’s Points (adapted recipe): 7*

* This ended up being less points due to the swap in peas for edamame.

Chicken Paillard with Summer Salad

Standard

What to do with those delicious cucumbers (or pickling cucumbers, as the case may be) and cherry tomatoes? Like a message from heaven, this recipe found its way into my inbox last week and within 24 hours this dish was on the table. Hopefully this post will be similarly times for you.

20140730-200348-72228403.jpg

This recipe is adapted from its original version on Weelicious, which is full of family-friendly recipes, often especially geared toward kids.

Crispy Chicken Paillard with Summer Salad (serves 2 normal appetites and 1 lighter)

Prep Time: 15 mins,
Cook Time: 10 mins,

Ingredients

2 boneless and skinless chicken breasts
1/2 cup flour
1 large egg, whisked
1 cup panko bread crumbs
1/2 teaspoon salt
1 Tb canola or vegetable oil, for the pan
1/2 cup halved cherry tomatoes
1 pickling cucumber, thinly sliced
1 tablespoon chopped cilantro
1 teaspoon lemon juice

1.Place one chicken breast between 2 sheets of parchment paper and pound using a tenderizer until about 1/3 inch and even thickness. Repeat with all the breasts.
2. Season each chicken breast with 1/4 teaspoon salt.
3. In 3 small dishes place flour, egg and breadcrumbs separately.
4. Dredge both sides of chicken breast in flour, followed by egg and then bread crumbs and repeat with remaining breasts.
5. Heat about 2 tablespoons of oil in a skillet over medium high heat and place chicken breasts in skillet (do in batches if needed and add extra oil if needed for second batch)
6. Fry until golden brown, about 5-6 minutes and flip to brown other side
7. Place tomatoes, cucumbers, corn and cilantro into a mixing bowl. Drizzle with lemon juice and toss to coat
8. When chicken is golden brown and fully cooked place on a cooling rack to cool slightly
9. Spoon salad over top and serve immediately.

Source: http://weelicious.com/2014/07/25/chicken-paillard-with-summer-salad-recipe/

So here’s how I would adapt this next time:
* Definitely use seasoned panko or include grated Parmesan cheese in with the panko OR both! The breeding needs a bit more flavor.
* Maybe dice the cucumber instead of slicing. The chunkier pieces were definitely easier to eat.
* If I have corn on hand, I would try to add that into the salad just to try it the way Weelicious does it.

Regardless, I loved the salad itself. I will definitely do that again– a little lemon and cilantro? Done!